
This guide will show you how to create a test or quiz in the training module.
Definition
Tests are quizzes used to test the knowledge of learners.
The objective of the test may be to:
- Train: Train the employee by asking questions
- Evaluate: Evaluate/Certify the employee on a training subject. Certify a certain level.
Actions
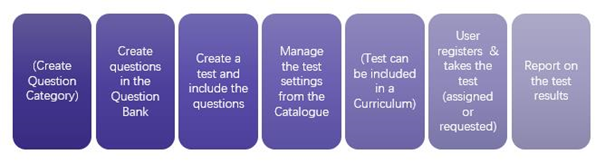
To add a test to the catalog, you must first:
- Create categories to classify questions,
- Create the questions in the question bank, then
- Create a test and include these questions.
Step 1 - Create Categories to Store Questions
 This will save time when creating the quiz, you will have the ability to filter the questions by category.
You can create categories by topic or create a category for each test.
To create your categories, click on the Learning Administration Menu> Catalog and Learning Objects > Test > Question bank > Category tab
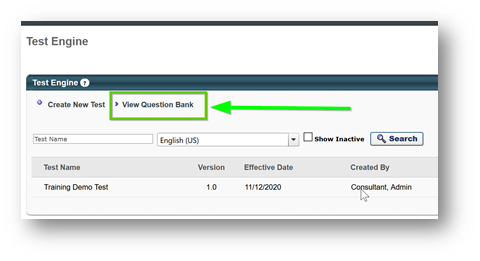
Click on 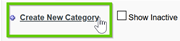 to create a category.
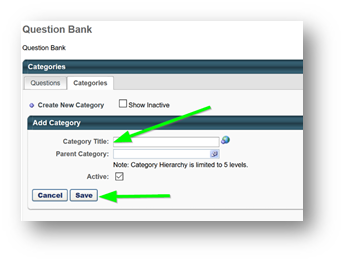
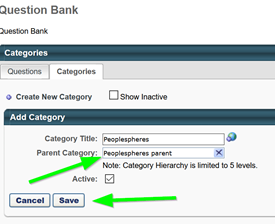
We advise you to create a first category with the name of your company, which will serve as a parent. Then, you can attach the subsequent categories to this parent to create a hierarchy.
- Category title: Enter your company name
-
After saving, create a new category and select the parent that you previously created.
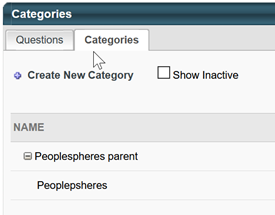
- Result :
Step 2 : Create Questions
To create questions in the question bank, go to the Learning Administration Menu> Catalog and Learning Objects> Test > Question bank.
- Click on Create question to add a new question to the bank.
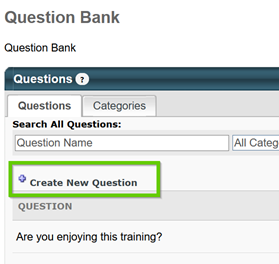
- Enter the title of the question on the Question field.

- Then choose the Response Type you expect from the drop-down list. Several types of responses exist:
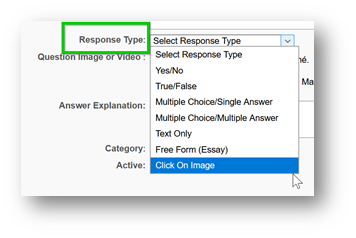
We advise you not to use Text Only or Free Form (Essay) Question which involve the intervention of a corrector. If you still want to use these types of questions, please get in touch with your consultant.
DETAILS OF ANSWER TYPES
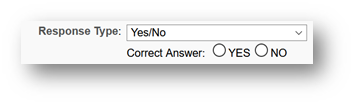
- YES / NO: You must select the correct answer under the drop-down menu
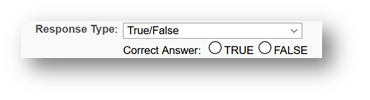
- TRUE / FALSE: You must select the correct answer from the drop-down menu
- A MULTIPLE CHOICE / SINGLE ANSWER: Only one answer is correct among the answers given, select the correct answer using the "Correct" box.
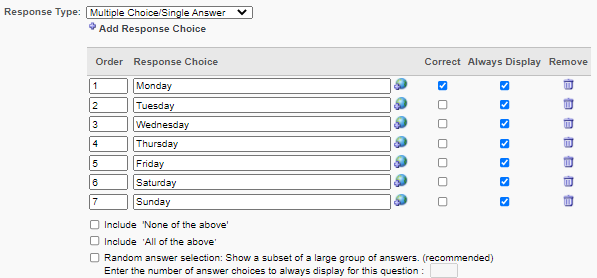
- Add Response Choice: Allows you to add answer choice
- Always Display: The correct answer must always be on the selected choice purposed
- Include “None of the above”: allows you to include predefined answers, as well as an option that allows the user to say the answer isn’t included in the options
- Random answer selection: Allows you to have the answers appear randomly
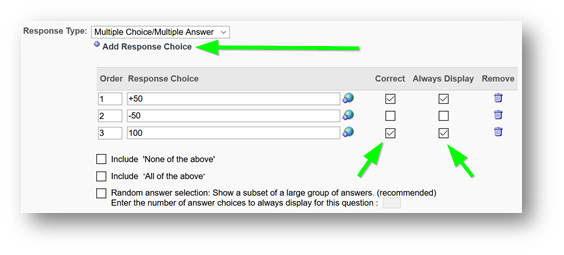
- A MULTIPLE CHOICE / MULTIPLE ANSWER: Several answers are correct among the answers given, select the correct answers using the "Correct" box.
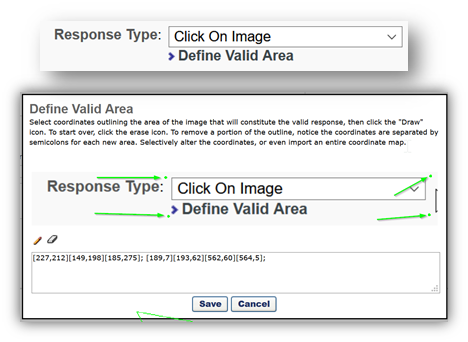
- CLICK ON THE IMAGE: Allows you to define an area corresponding to a correct answer on an image.

- Once the image is loaded, click on "Define valid area"
-
- Place dots (green) around the area corresponding to the correct answer with the mouse.
- Click on SAVE: the valid zone is displayed in green:
- If the learner clicks in this area, the answer will be considered correct.
- For each response type, you can upload an image or a video to illustrate the question.
- The answer explanation that you enter on the field can be displayed once the user has answered the question, to give more details on the correct answer.

- This field can be translated into different languages with the icon. .
- Then fill in the category of the question.
Click Submit.
Step 3 : Creating the Quiz or Test
Once you've created all your questions, you can create the quiz or test.
Create a test from the question bank go to the Learning Administration Menu> Catalog and Learning Objects> Test > Create a new test
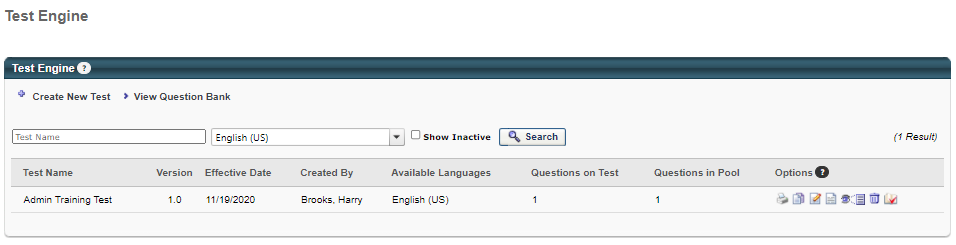
You must then complete several consecutive sections.
General

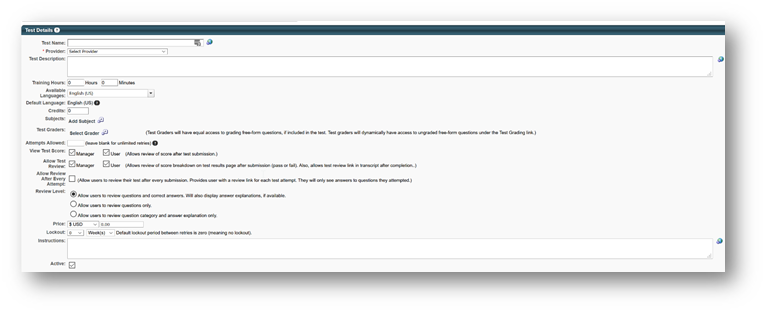
- Test name: Test title which will be visible to the user
- Provider: choose the name of your company from the list of providers
- Test description: give details of the test
- Training hours: duration of the test.
- Available languages: languages in which the test is created.
- Credits: if there is an internal credit system.
- Subjects: subject(s) of the test.
- Test Grader: if the test contains a question of the “Open question” type (essay), you must designate a corrector to review and mark the user's answer. We recommend that you do not use questions of this type.
- Attempts Allowed: Define the number of times the user can take the test before its results are final.
- View test Score: The user and their manager can review the score and all the answers to the test once completed.
- Authorize Review after each attempt: Users will be able to review their test after each submission
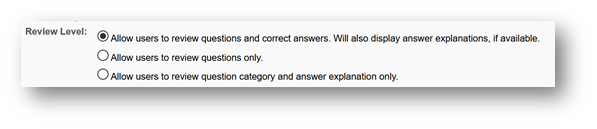
- Review level: Allows users to review different levels of responses:
- Price: To be filled in if you wish to enter the price of the test.
- Lockout: Define a minimum delay between two attempts.
- Instructions: Displayed on the first page the instructions when the user starts the test.
Click on Next
Structure
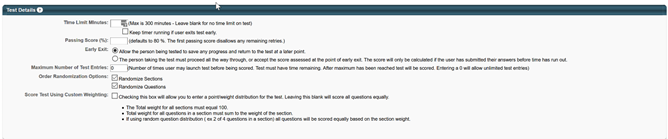
- Time Limit Minutes: Time left for the test takers to perform the test.
- Passing Score (%): Minimum % of correct answers required to pass the test.
- Early Exit: Allows you to authorize or not the learner to quit the test and then come back to it by saving their progress.
- Maximum Number of Test Entries: Number of times the user can quit and relaunch the test before submitting it.
- Order Randomization Options: Test question display mode allows you to randomly display the sections and/or questions of the test.
- Score Test Using Custom Weighting: Allows enter Weight distribution or not for different test questions. The weighting is managed in the “Questions” section.
- Questions: add at least one section in the test. Then add questions in each section using the
 button.
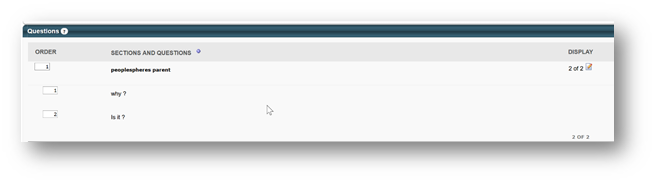
The  button in the "Display" column allows you to define the number of questions randomly asked of the user among all the questions in the section.
Availability
Define the visibility of the test in the catalog
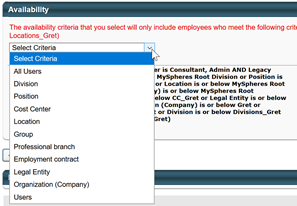
WARNING: do not select ALL USERS. If you want to make your test visible to all your users, choose Organization (Company).
Pricing
In the Default price field, you must first select a currency from the drop-down list.
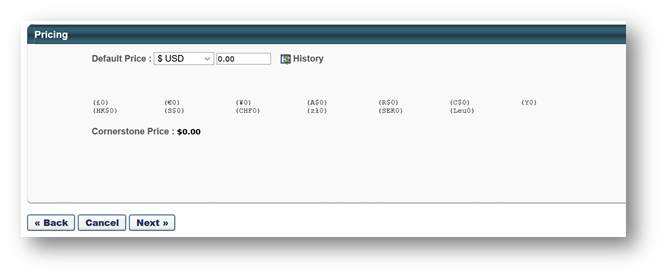
Then you can indicate the price of the training if necessary.
Click on Next.
Confirm
The summary of all the information related to the test is now created.
Once confirmed, you can finalise the creation by clicking on "Finish"
 Good to know: the visibility of the object in the catalog is not necessarily instantaneous, please allow up to thirty minutes.
If you do not define a visibility, you as an HR administrator could still assign the test or add it to a curriculum.